Showing posts with label Desserts. Show all posts

1 February 2021

Badusha using Idhayam Mantra


Badusha using Idhayam Mantra

Badusha is a traditional Indian Sweet recipe. I have used Idhayam Mantra Groundnut oil and ghee to deep fry the badusha. Idhayam Mantra Groundnut oil is pure and unrefined and good for health. I have used a combination of groundnut oil and ghee as its very good for health and heals joint pains. Traditionally all deep frying was made using groundnut oil in days back during my great grandmother. From the time Idhayam introduced Gingerly oil, my family is using it for cooking. It is pure and heart healthy. You can visit them @Idhayam for more details.

Badusha

No. of Servings : 10


Ingredients

Maida – 2 cups

Salt a pinch

Baking Powder – ½ tsp

Baking Soda – ¼ tsp

Ghee – ¼ cup

Curd – ¼ cup

Cardamom essence – ¼ tsp

Water as required

Idhayam Mantra Groundnut oil for deep frying

         Ghee – 5 tbsp for deep frying

For Sugar Syrup

Sugar – 2 cups

Water – 1 cup

Cardamom essence – ¼ tsp

Orange food colour a pinch


Preparation Method

1.   In a mixing bowl add maida, salt, baking powder and baking soda and mix well.


2.   Add ghee, curd and cardamom essence and mix well.


3.   Make stiff dough with required water.
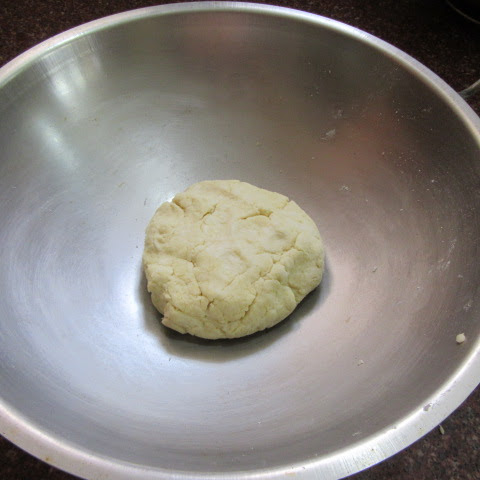


4.   Do not knead too much, just mix in slightly.


5.   Cover with a lid and let it rest for 15 minutes.


6.   Meanwhile, in a kadai, add sugar and water and bring to a boil and continue boiling till the sugar syrup is one string consistency. Add cardamom essence and food colour and mix well. Keep aside.


7.   Mix the dough slightly and make balls, flatten it and make a thumb impression in the center.


8.   In a kadai, heat Idhayam Mantra groundnut oil and ghee and deep fry the badusha till golden brown.


9.   Add them to the warm sugar syrup.


10. Badusha is ready to serve.


29 June 2017

Mango Rava Cake


Mangoes are in season now, just thought of trying a cake out of it. I made a mango rava cake and it turned out very delicious. Hurry !!! before the mango season ends why don't you folks try this awesome cake. This cake has a shelf life of one day , so please refrigerate it.

Mango Rava Cake

No. of Servings : 6

Ingredients

Rava / Sooji - 2 cups

Sugar - 2 cups

Yogurt / Curd thick - 2 cups

Ghee melted - 4 tbsp

Baking powder - 1 tsp

Salt - a pinch

Mango ripe - 1 medium


Preparation Method

1. In a mixing bowl add rava, sugar, baking powder and salt and mix well.

2. To the above mixture add thick yogurt and melted ghee and mix well.

3. Peel, chop mango and puree it.

4. Add it to the rava mixture.

5. Rest it for 1 hr.

6. Preheat oven at 180 degree for 10 minutes in mode "bake".

7. Grease a 7" diameter mould with ghee and pour the cake mix into it.

8. Bake it for 40 minutes at 180 degrees at mode "bake".

Notes :

This cake has a shelf life of one day , so please refrigerate it.


5 January 2017

Apple Sponge Cake


My twist to the regular sponge cake is that I have added whole wheat flour instead of maida / all purpose flour and also added apple for more flavour and nutrition.

Apple has a lot of nutrients in them. They are very rich in antioxidants, flavanoids and dietary fibre. It reduces the risk of developing cancer, diabetics, hyper tension and heart diseases. It has a lot of vitamins and minerals.

Apple Sponge Cake

Ingredients

Wheat flour  - 2 cup

Sugar - 1 cup

Eggs - 4

Baking Powder - 1 tsp

Vanilla essence - 1 tsp

Apple - 1 medium


Preparation Method

1. Grate apple and keep aside.

2. Sieve wheat flour and baking powder and keep aside.

3. Preheat the oven in mode 'toast' at 180 degrees for 10 minutes.

4. In a mixing bowl, add sugar, vanilla essence and eggs and whip it using an electric mixer with low speed. When the eggs are mixed well, after 2 to 3 minutes, whip again for 10 minutes in medium speed.

5. Into the above mixture, add 1 tbsp. of the wheat flour and fold into the egg mixture with a wooden spoon. Mix gently. When the flour is mixed well, add 1/2 of the flour and mix again gently. Then finally add the remaining flour and mix well, but gently. This way, the flour mixes into the egg mixture evenly without forming lumps.

6. Mix in the grated apple and mix well.

7. Grease a 8" cake mould with ghee or butter.

8. Pour into it the cake batter.

9. Bake it for 30 minutes at 180 degrees in 'bake' mode.

10. It’s better to check the cake after 25 minutes, if it’s done. Time taken to bake depends on oven you are using. Take a skewer and insert into the centre of the cake all the way down till the bottom. If the skewer comes clean then the cake is cooked.


31 December 2016

Millet Groundnut Cake


Happy NEW YEAR Folks :)

Let's start the new year with a healthy note. For this new year I have made a millet groundnut sponge cake. The healthier part of it is that I have substituted half of the amount of maida with healthier millet flour. I have also added groundnut for extra nutrition and flavour. Hope you will try this cake and enjoy it as much as I enjoyed baking and eating it :)

Millet Groundnut Cake

Ingredients

Maida / All purpose flour  - 1 cup

Millet flour - 1 cup

Sugar - 1 cup

Eggs - 4

Baking Powder - 1 tsp

Vanilla essence - 1 tsp

Groundnut toffee - 100 gms


Preparation Method

1. Break the groundnut toffee and grind it into a fine powder, keep aside

2. Sieve maida / all purpose flour, millet flour and baking powder and keep aside.

3. Preheat the oven in mode 'toast' at 180 degrees for 10 minutes.

4. In a mixing bowl, add sugar, vanilla essence and eggs and whip it using an electric mixer with low speed. When the eggs are mixed well, after 2 to 3 minutes, whip again for 10 minutes in medium speed.

5. Into the above mixture, add 1 tbsp. of the maida, millet flour mix and fold into the egg mixture with a wooden spoon. Mix gently. When the flour is mixed well, add 1/2 of the flour and mix again gently. Then finally add the remaining flour and mix well, but gently. This way, the flour mixes into the egg mixture evenly without forming lumps.

6. Mix in the powdered groundnut toffee and mix well.

7. Grease a cake mould with ghee or butter.

8. Pour into it the cake batter.

9. Bake it for 30 minutes at 180 degrees in 'bake' mode.

10. It’s better to check the cake after 25 minutes, if it’s done. Time taken to bake depends on oven you are using. Take a skewer and insert into the center of the cake all the way down till the bottom. If the skewer comes clean then the cake is cooked.


29 December 2016

Dates Wheat Cake


My twist on the regular butterless sponge cake is that I have added whole wheat flour instead of regular all purpose flour / maida and I have also added dates for more nutrition and added flavour. The cake turned out delicious and yum as I expected :)

Dates helps in weight loss, promotes heart health, relieves constipation and supports regular bowl movement, reduces blood pressure and iron deficiency.

Dates Wheat Cake

Ingredients

Wheat flour  - 2 cup

Sugar - 1 cup

Eggs - 4

Baking Powder - 1 tsp

Vanilla essence - 1 tsp

Dates - 10 -15

Water - 1/2 cup


Preparation Method

1. Pit the dates and chop them finely. In a pan add water and dates bring to boil and turn off the stove, let it cool and soak. Grind it to a fine paste. Keep aside

2. Sieve wheat flour and baking powder and keep aside.

3. Preheat the oven in mode 'toast' at 180 degrees for 10 minutes.

4. In a mixing bowl, add sugar, vanilla essence and eggs and whip it using an electric mixer with low speed. When the eggs are mixed well, after 2 to 3 minutes, whip again for 10 minutes in medium speed.

5. Into the above mixture, add 1 tbsp. of the wheat flour and fold into the egg mixture with a wooden spoon. Mix gently. When the flour is mixed well, add 1/2 of the flour and mix again gently. Then finally add the remaining flour and mix well, but gently. This way, the flour mixes into the egg mixture evenly without forming lumps.

6. Mix in the dates puree and mix well.

7. Grease a cake mould with ghee or butter.

8. Pour into it the cake batter.

9. Bake it for 30 minutes at 180 degrees in 'bake' mode.

10. It’s better to check the cake after 25 minutes, if it’s done. Time taken to bake depends on oven you are using. Take a skewer and insert into the center of the cake all the way down till the bottom. If the skewer comes clean then the cake is cooked.


23 December 2016

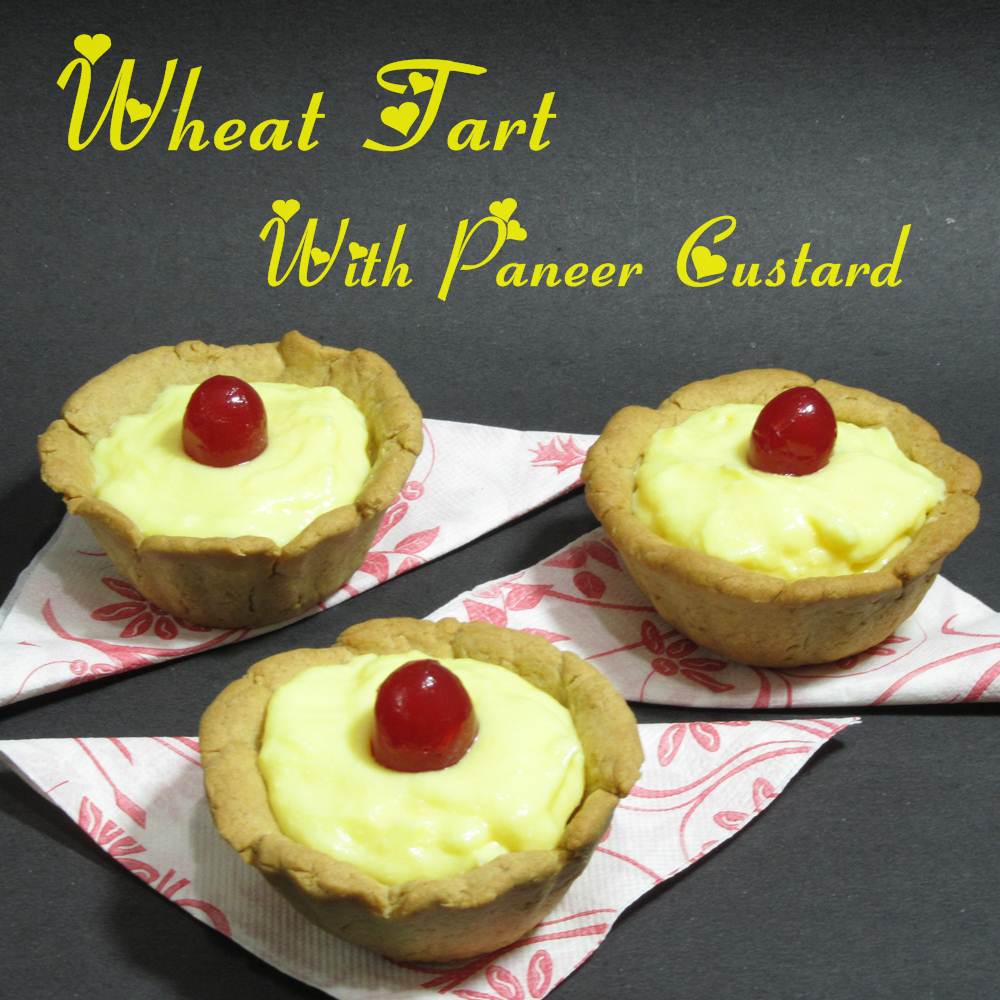
Wheat Tart With Paneer Custard


"Happy Christmas - Merry Christmas" to all out there from my Boni's Healthy Twists. Here I am again with a healthy tart. My twist on the tart is that I have made it with whole wheat flour instead of the traditional white flour. For the filling I have used Paneer / Cottage cheese which is healthier than the regular cream cheese.

Wheat Tart With Paneer Custard

Servings: 6 mini tarts

Ingredients

For the Tart

Wheat Flour - 200 gms

Butter - 75 gms (cold and firm to touch)

Powdered sugar - 2 tbsp

Ice cold water - as required

Cinnamon powder - 1/4 tsp

Salt - a pinch

For the Filling

Paneer - 200 gms

Custard Powder - 4 tbsp

Milk - 400 ml

Sugar - 1 cup


Preparation Method

1. In a mixing bowl, mix together all the ingredients for tart except butter and water.

2. Cut the butter into small cubes and mix it into the tart mix. With the tips of your fingers, mix it quickly but gently till the butter gets incorporated in the tart mix and the mix comes to the consistency of breadcrumbs.

3. Add required amount of ice cold water little at a time and bring the dough together. Do not knead the dough.

4. Wrap the dough in a cling-wrap and refrigerate it for 15 - 20 minutes.

5. Preheat OTG oven at 180 degrees for 10 minutes in mode 'toast'.

6. Grease the cup cake moulds with butter.

7. Roll out tart dough to 1/4 of an inch. Place dough into the mould. Press it gently into the mould. Trim off the edges.

8. Bake it for 20 minutes in OTG at 180 degrees in mode 'bake'.

For the Filling

1. In a pan mix milk, sugar and custard powder, bring to a boil and simmer it till the custard thickens. Cool and keep aside.

2. Grind to smooth paste paneer and prepared custard.

Presentation

Fill each tart with the paneer custard filling and top it with cherry or any dry fruits and nuts of your choice.


Serve Warm or hot. It tasted delicious hot from the oven with a warm paneer custard filling.

9 November 2016

Banana Walnut Cake


My twist on the regular banana sponge cake is that I have added walnut for more nutrition. In this banana sponge walnut cake I have not added butter or oil.

Banana Walnut Cake

No. of Servings : 6

Ingredients

Maida / All purpose flour - 125 gms

Banana - 2 medium ripe

Egg - 3

Baking powder - 1 tsp

Walnut - 20

Sugar - 100 gms

Vanilla essence - 1 tsp


Preparation Method

1. Grind walnut and banana to a smooth paste.

2. In a mixing bowl, add egg and sugar and vanilla essence and blend well with an electric blender for 10 minutes.

3. Sieve maida and baking powder. Add it little by little to the egg mixture and mix gently till it is completely incorporated.

4. Add banana walnut paste and mix well.

5. Preheat an OTG to 180 degrees for 10 minutes in mode "toast"

6. Grease and flour the mould and pour the cake batter into it and bake in a preheated oven at 180 degrees for 30 minutes in mode "bake".


2 October 2016

Bread Pudding - in pressure cooker


You don't need an oven to do this bread pudding. I steamed it in a pressure cooker and it turned out delicious and yum :)

Bread Pudding - in pressure cooker

No. of Serving : 5

Ingredients

Bread - 10 - 12 slices

Milk - 500 ml

Egg - 5

Sugar - 1 cup

Fennel powder - 1 tsp


Preparation Method

1. In a flat bottom pan which you can place inside the pressure cooker, take milk, egg and sugar and beat well.

2. Add fennel powder and mix well.

3. Add the bread slices along with its edges, the edges will be tasty after cooked so you can add them also.

4. Pour water in the pressure cooker, place this vessel inside, close with a lid, do not put the whistle.

5. Steam cook it for 20 minutes in high flame.

6. Garnish with chocolate chips or chocolate shavings and nuts.